Adobe Illustrator
Autodesk Fusion
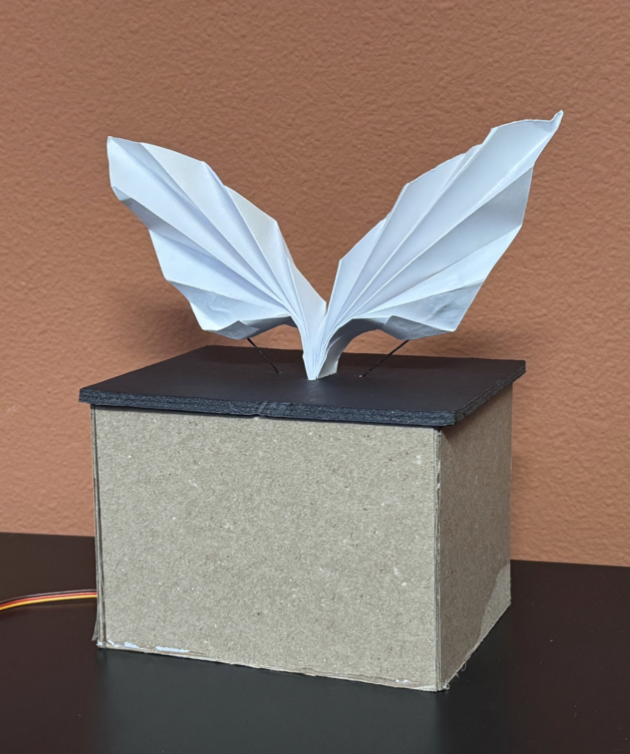
This design is based on an origami structure that folds and unfolds gently and is powered by a servo motor. The string is attached to the second to last flap of the origami design and is connected to a servo motor which rotates 90 degrees to pull both strings down, creating a fluid, flying motion. This is all powered by a DFRobot Mini BLE board running on Arduino IDE.
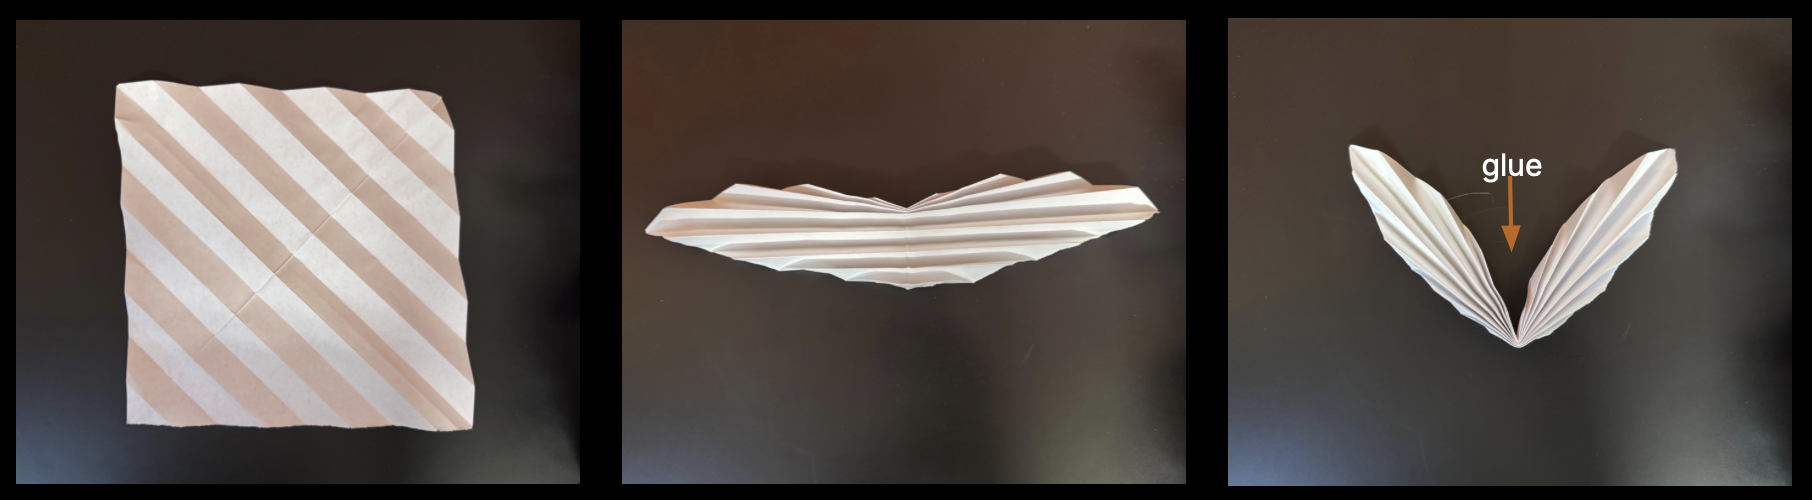
The design starts with a 16 fold diagonal division as described in Folding for Designers. The paper is then folded in the middle to create a sharp angle, resembling a wing. The two center flaps are then glued together to create a tight center.
The servo motor rotates from 90° to 180° which allows for the string to be extended at full length at 180° creating the open wing and shortest length creating a folded wing at 90°.
servo motor
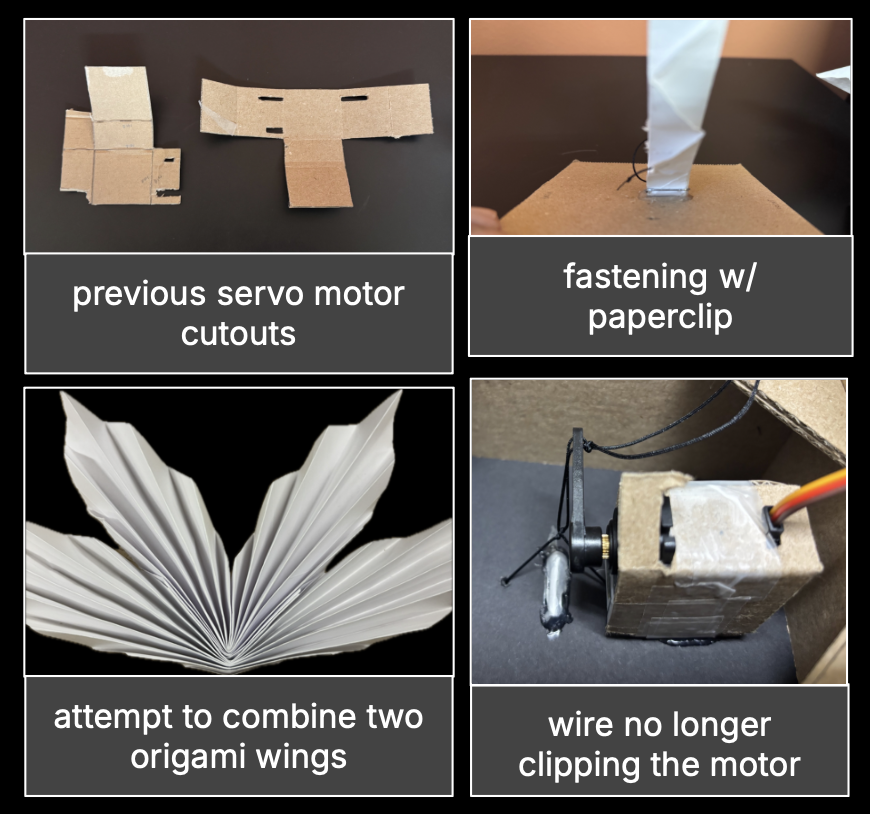
There were several challenges in building this prototype. Initially, a paperclip was used to hold the origami tension, but embedding it into the foam core solved the issue. Multiple servo motor prototypes were tested before settling on a properly measured cutout that secured the motor to the box. An attempt to use two origami designs for a larger wing failed due to a weak string mechanism. Lastly, the wire getting caught on the motor was fixed by repositioning the servo and adding a knot in the elastic string.
challenges
practicing making gears!
For this project, we needed to create a sound machine that moved mechanicically with only the use of a DC motor. I decided to build an automated singing bowl experience, which proved harder than expected.
We started a mid-fi prototype made out of wood and cardboard, to prototype our frame. After refining the measurements, adjusting the size of the frame to be 1 inch larger, and removing any visible finger joints, we cut and assembled the final frame structure. Now, moving on to the more difficult task of designing a handle, we first started with the idea of using a flexible piece of clear tubing to allow the mallet to guide itself around the rim of the bowl. After trying this approach, we quickly realized that the clear tubing did not create enough pressure against the rim of the bowl to make it “sing”. Also we did not assign the right rotation point on the servo when attaching the clear tubing, so it did not trace around the rim of the bowl as we hoped, but just rotated on itself. We pivoted to a different approach, designing and 3D printing a new mallet to specifically match the circumference of the singing bowl, and this worked better but the sound of the motor was quite loud. In order to make the motor quieter, we swapped to a quieter motor and also created a gear mechanism to turn the arm of the mallet. We 3D printed two gears: one attached to the DC motor that rotated the gear that was connected to the mallet. Our gear mechanism was more stable and allowed for a smoother motion for the mallet to go around the bowl.
Overall, we learned that getting exact measurements for things we designed was critical. More so than we had thought. We made this mistake many times, and had to iterate and re-print and re-cut some pieces. Another mistake we made was jumping in too fast to the project. Similarly, spending plenty of time iterating on the design and considering all possibilities slowly aand thoroughly would have saved us a lot of time throughout the process. We learned a lot throughout this project - common design mechanisms to fix certain issues, design etiquette, and the general prototyping process.
final design